Account & Security
Manage multiple workspaces (agencies)
Run a separate LeadJourney workspace for each client – create new client workspaces, switch between them in one click, and set each one up from the Agency area.
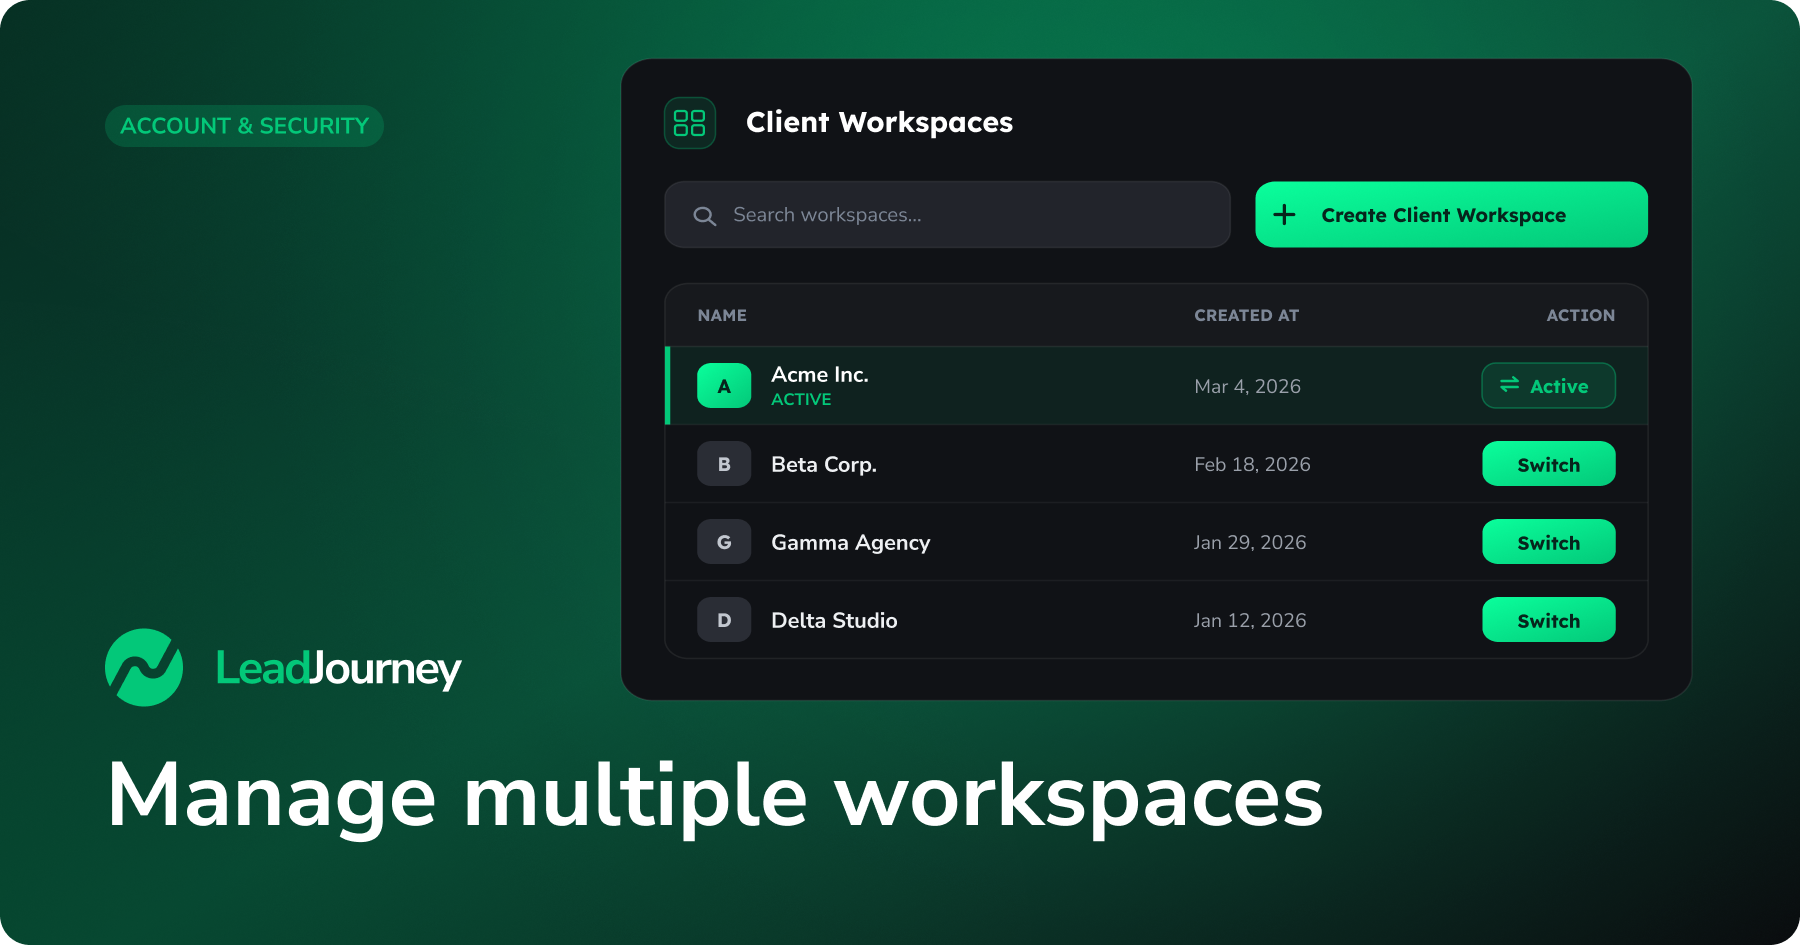
If you're an agency, you typically keep each client in their own workspace – separate tracking, ad accounts, reports and team. LeadJourney lets you create a new workspace per client, switch between all of them in a click, and manage them from a dedicated Agency area. This guide walks through the whole flow.
Agency access has to be enabled
Creating client workspaces and the Agency dashboard are only available when your account is set up as an agency. If you don't see the Agency option in your profile menu, your account isn't an agency yet – reach out to your LeadJourney account manager to have it enabled.
Switch between workspaces
Anyone who belongs to more than one workspace can switch between them from the profile menu – you don't need to log out and back in.
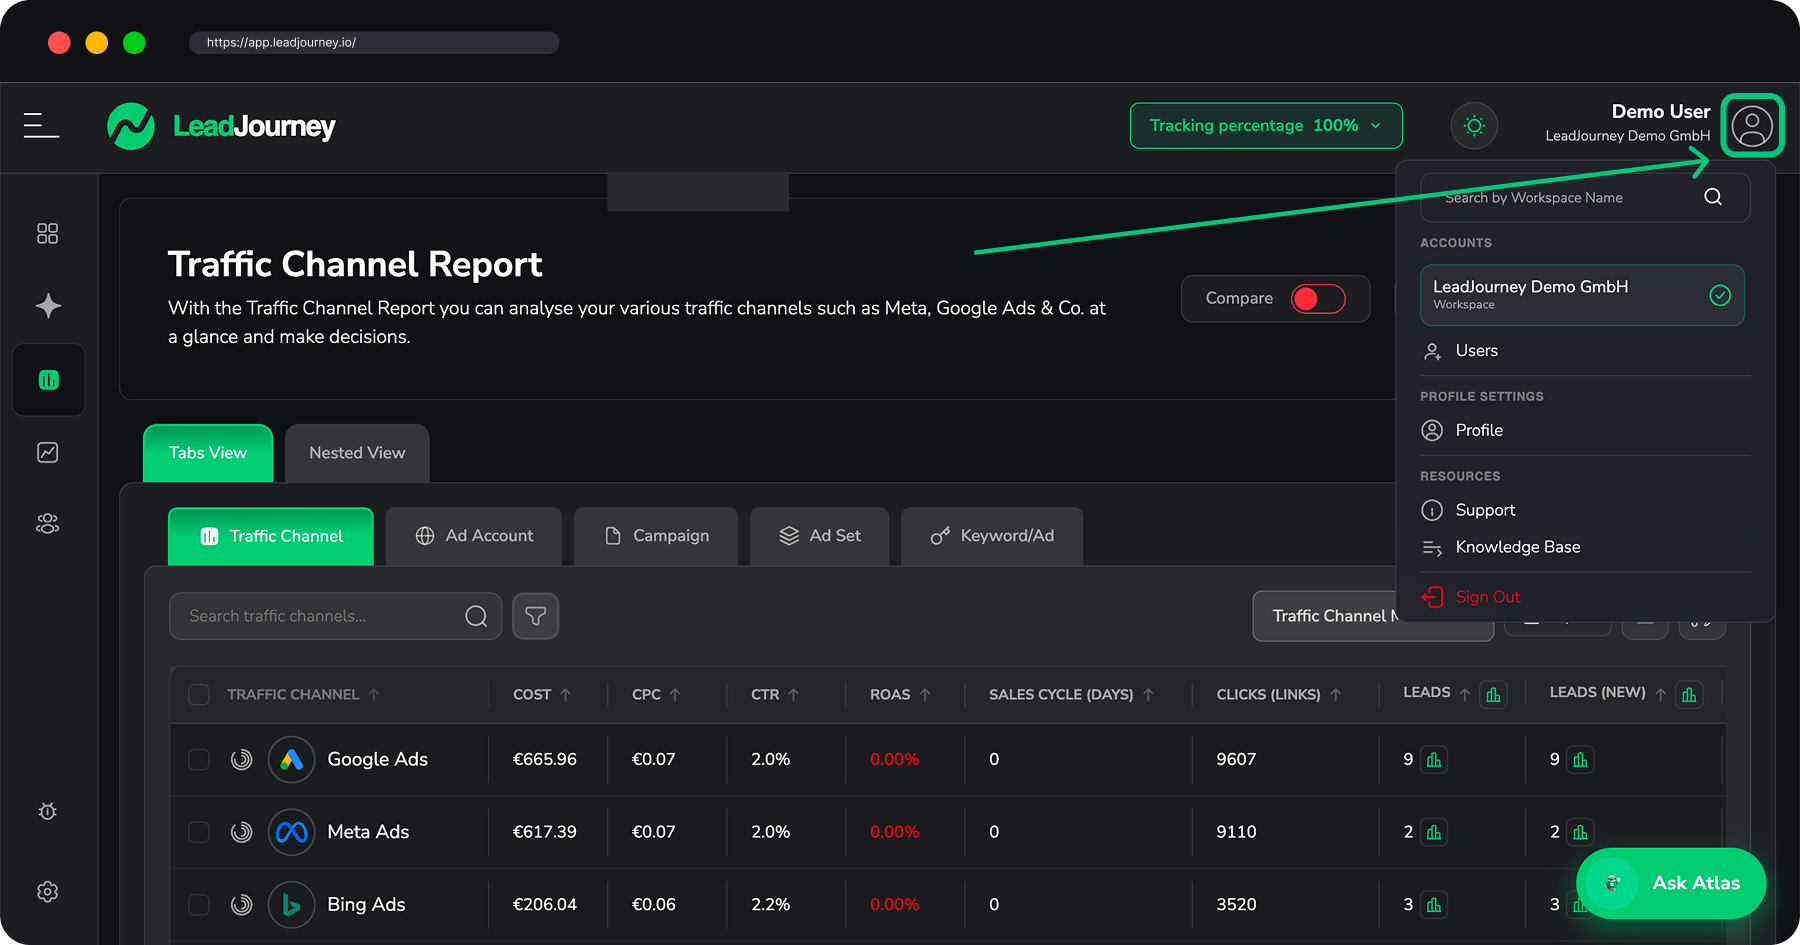
Open the profile menu
Click your profile avatar in the top-right corner of LeadJourney. The menu opens with a search box and an Accounts section listing the workspaces you have access to.
Find the workspace
Start typing in Search by Workspace Name to filter the list, or just scroll. The workspace you're currently in is marked with a green checkmark.
Switch into it
Click the workspace you want. LeadJourney reloads into that workspace, and everything – reports, tracking, settings – now reflects the workspace you switched to.
Open your agency dashboard
The Agency area is where you see every client workspace in one place.
Where to find it
Open the profile menu (your avatar, top-right) and click Agency, or go straight to app.leadjourney.io/agency/workspaces. You'll land on the Client Workspaces page.
It lists every workspace you manage in a table with the workspace Name, the date it was Created At, and an Action column. Use the search box to filter by name once the list grows, and click Switch on any row to jump straight into that client's workspace.
Create a new client workspace
Open the Agency dashboard
From the profile menu, click Agency to open the Client Workspaces page.
Start a new workspace
Click the green + Create Client Workspace button in the top-right. The Create Client Workspace form opens.
Name the workspace
Under Workspace, fill in the Workspace Name – this is usually the client's company name (e.g. Acme Inc.). It's how you'll recognise the workspace in your switcher and agency list, so keep it clear and consistent.
Add the client contact
Under Client Contact, enter the person who should own the workspace on the client's side:
- First Name and Last Name – required.
- Email – required. This becomes the workspace's login, and it's where the welcome email is sent.
- Phone – optional.
Create the workspace
Click Create Workspace. What happens next depends on the email you entered:
- New to LeadJourney – the workspace is created and an email with login credentials is sent to that address, so the client can sign in.
- Already has a LeadJourney account – the new workspace is created and that existing user is attached to it, so they'll find it in their own workspace switcher.
You're taken back to the Client Workspaces list, where the new workspace now appears.
The workspace is yours to manage too
As the agency, you can switch into the new workspace right away to set it up – you don't have to wait for the client to log in first.
Set up a newly created workspace
Once a client workspace exists, switch into it (from the Agency list or your profile menu) and set it up like any other workspace:
- Workspace details – set the company name, time zone, currency and time format under Settings → Sub-users → Workspace Information. See Edit your profile & account settings.
- Tracking – install the tracking script on the client's site. See Quickstart.
- Ad accounts – connect the client's Meta, Google, LinkedIn or Bing accounts. See Integrations.
- Team access – invite the client's team or your own colleagues and control exactly what each person sees. The Agency Member role is meant for people from your agency working on the account. See Add users to your workspace.
Tips for managing many workspaces
- Name workspaces consistently – use the client's company name (and a suffix like a region or brand if a client has several) so they're easy to find in the switcher.
- Use search – both the profile-menu switcher and the agency list filter by name, so a good naming convention pays off as your client list grows.
- Mind which workspace you're in – the green checkmark in the switcher and the workspace name always show your current context. Double-check before you change settings or read reports.
- Grant the least access needed – when inviting people into a client workspace, start from the role's defaults and trim what they don't need, especially across client accounts.
Billing for client workspaces
Plans and billing aren't managed inside the dashboard – they're handled by the LeadJourney team. For anything to do with adding client workspaces to your plan, invoices or your agency arrangement, talk to your LeadJourney account manager. See Billing & subscription.
Troubleshooting
No Agency option in the menu
The Agency dashboard and Create Client Workspace only appear for agency accounts. If you don't see them, your account isn't set up as an agency – contact your LeadJourney account manager to enable it.
The client didn't get the welcome email
Ask them to check their spam folder, and make sure the email address was spelled correctly. If the address already had a LeadJourney account, no credentials email is sent – the workspace is simply added to their existing account, so they'll find it in their own workspace switcher.
Switched into the wrong workspace?
Just open the profile menu again and switch back. Switching never changes any data – it only changes which workspace you're looking at.
Related articles
Add users to your workspace
Invite team members and clients, and control what each person can access.
Edit your profile & account settings
Set a workspace's company, time zone and currency.
Connect your ad accounts
Link Meta, Google, LinkedIn and Bing to a client workspace.
Billing & subscription
How plans and invoices are handled at LeadJourney.
Add users to your workspace
Invite team members to your LeadJourney workspace, pick their role, and control exactly which reports and traffic channels each person can access.
Set up Two-Factor Authentication (2FA)
Add a second layer of security to your LeadJourney account with an authenticator app – enable 2FA, verify it and store your recovery codes.