2. Install the tracking script
Add the LeadJourney tracking script to every landing page, domain and subdomain – step by step.
This is step 2 of getting started. Once your tracking domain is ready, you install the tracking script on every page you want to measure. This is what actually records page views and leads – without it, your reports stay empty.
Prerequisite: a ready tracking domain
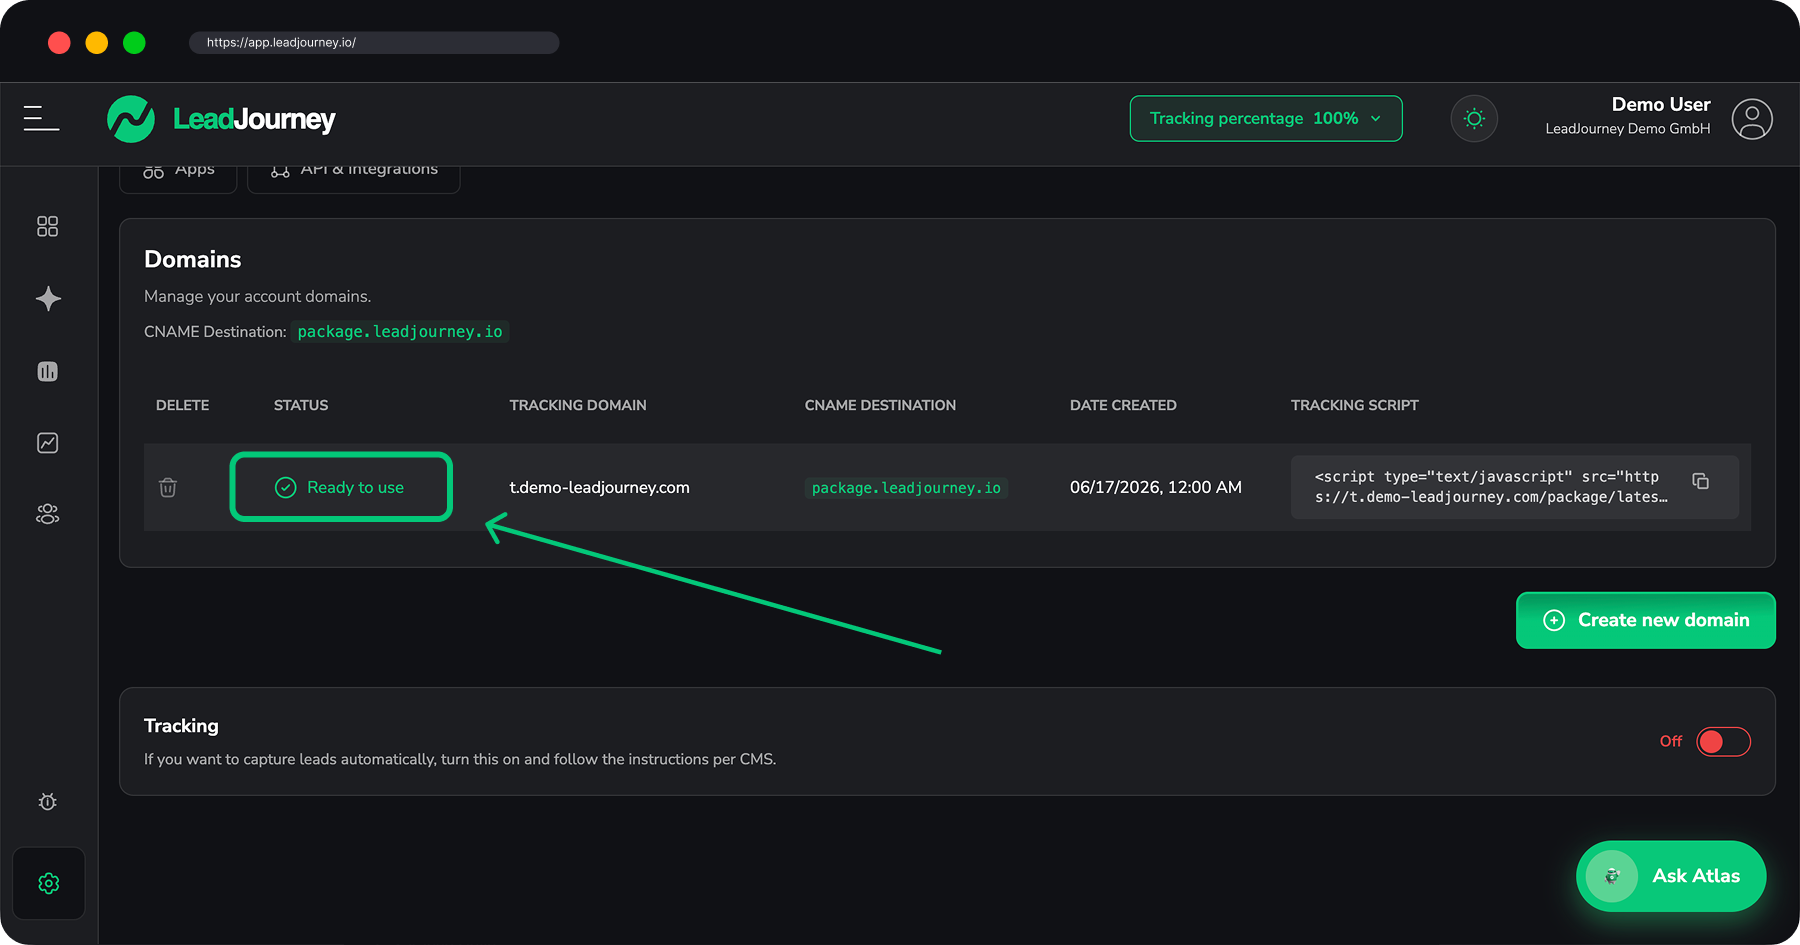
Your snippet is built from your tracking domain, so set that up first. See Set up your tracking domain. The domain must show Ready to use before the script will load.
What you'll learn
- Where to find your personal tracking snippet
- How to install it on every landing page, domain and subdomain
- How to install it on common website builders
- How to verify that tracking is live
Choose your platform
Already know what your site is built with? Jump straight to the full step-by-step guide for your platform. Not listed here? Follow the generic steps below – they work on any website.
WordPress
Header/footer plugin, Elementor, Divi or your theme.
Webflow
Site-wide via Custom Code, then publish.
Framer
Custom Code in Site Settings, then publish.
Wix
Custom Code in your dashboard, Head on all pages.
OnePage
Site Code in the editor, then publish.
Perspective
Tracking Code on each funnel step, then publish.
GoHighLevel
In your funnel or website Head Tracking Code.
Custom-coded site
Static HTML, server templates, SPA, Next.js or Nuxt.
Step by step
Copy your snippet
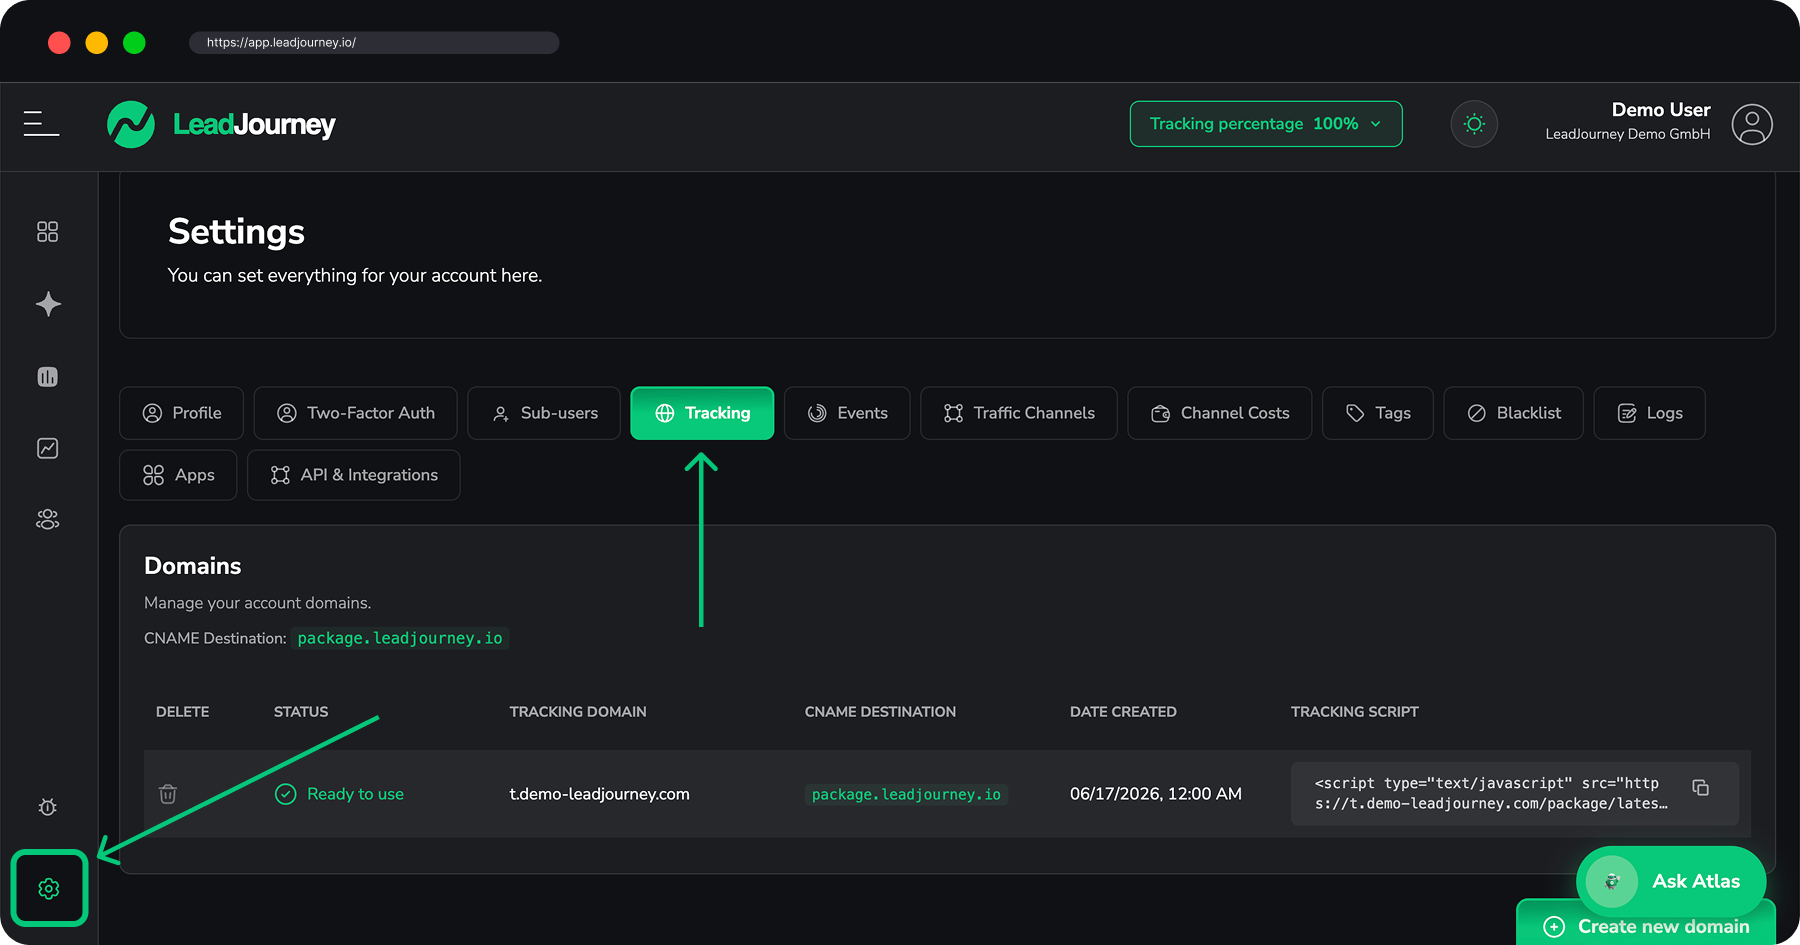
Open Settings → Tracking. In the row for your domain, the Tracking Script column shows your personal snippet – click the copy icon to copy it.
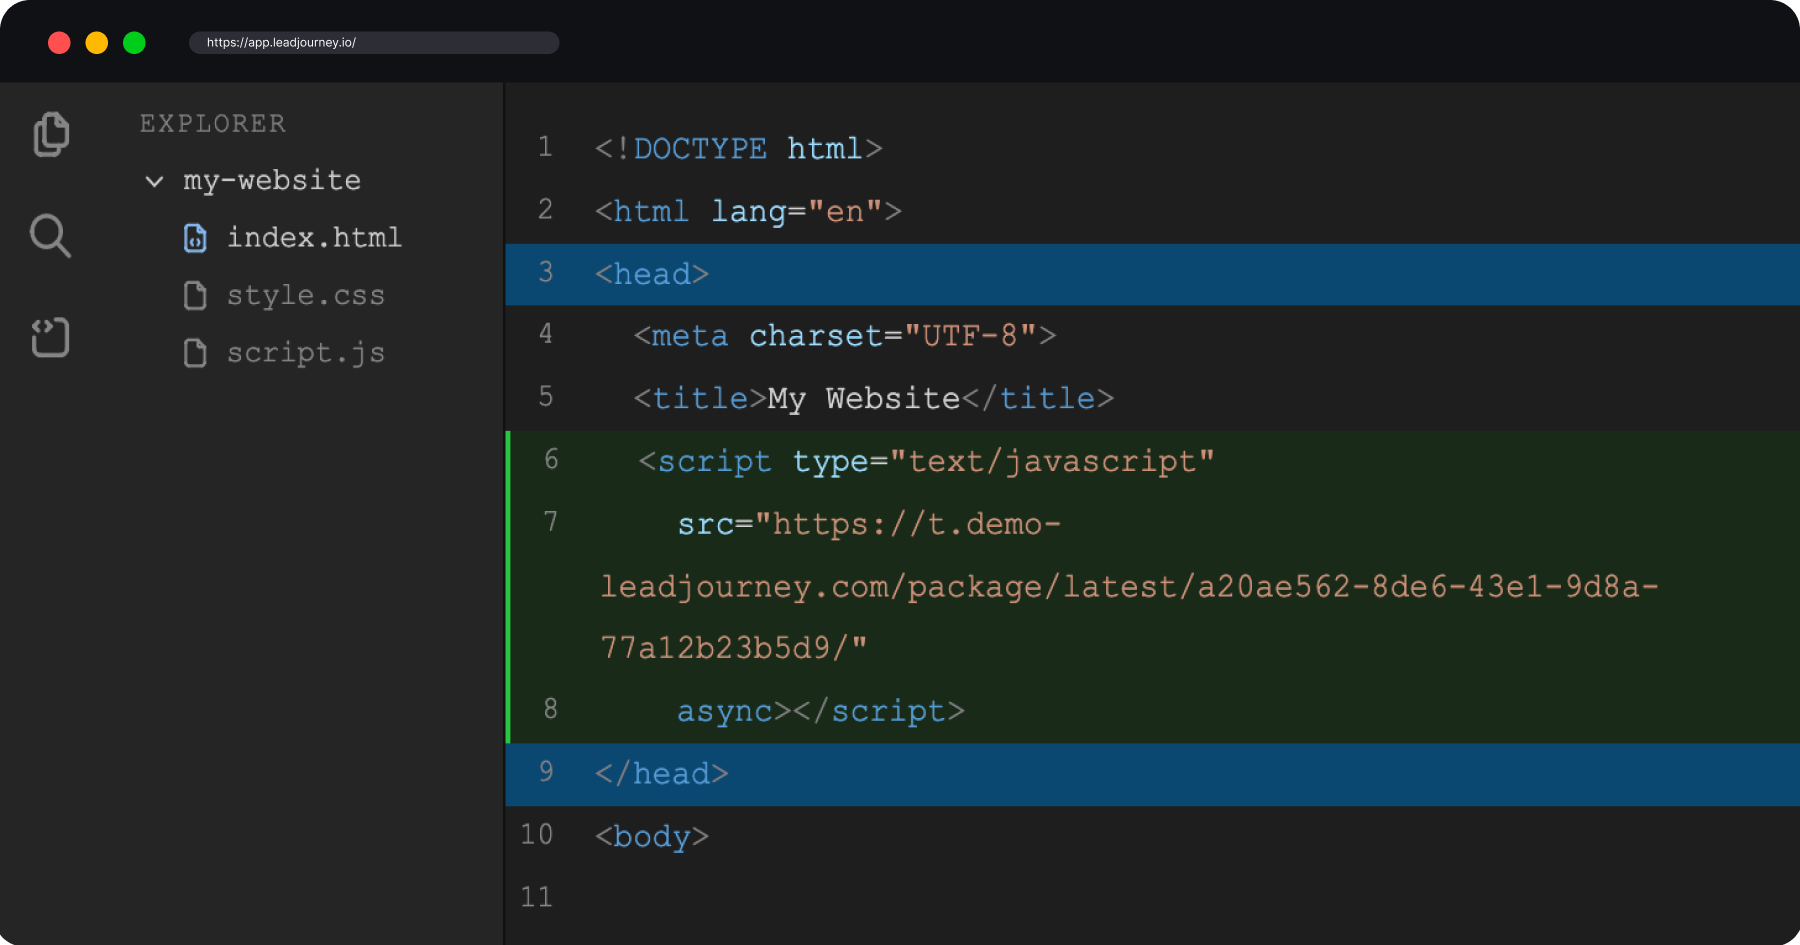
It contains your tracking domain and your workspace ID and looks like this:
<!-- LeadJourney Tracking -->
<script type="text/javascript" async
  src="https://track.yourdomain.com/package/latest/YOUR-WORKSPACE-ID/"></script>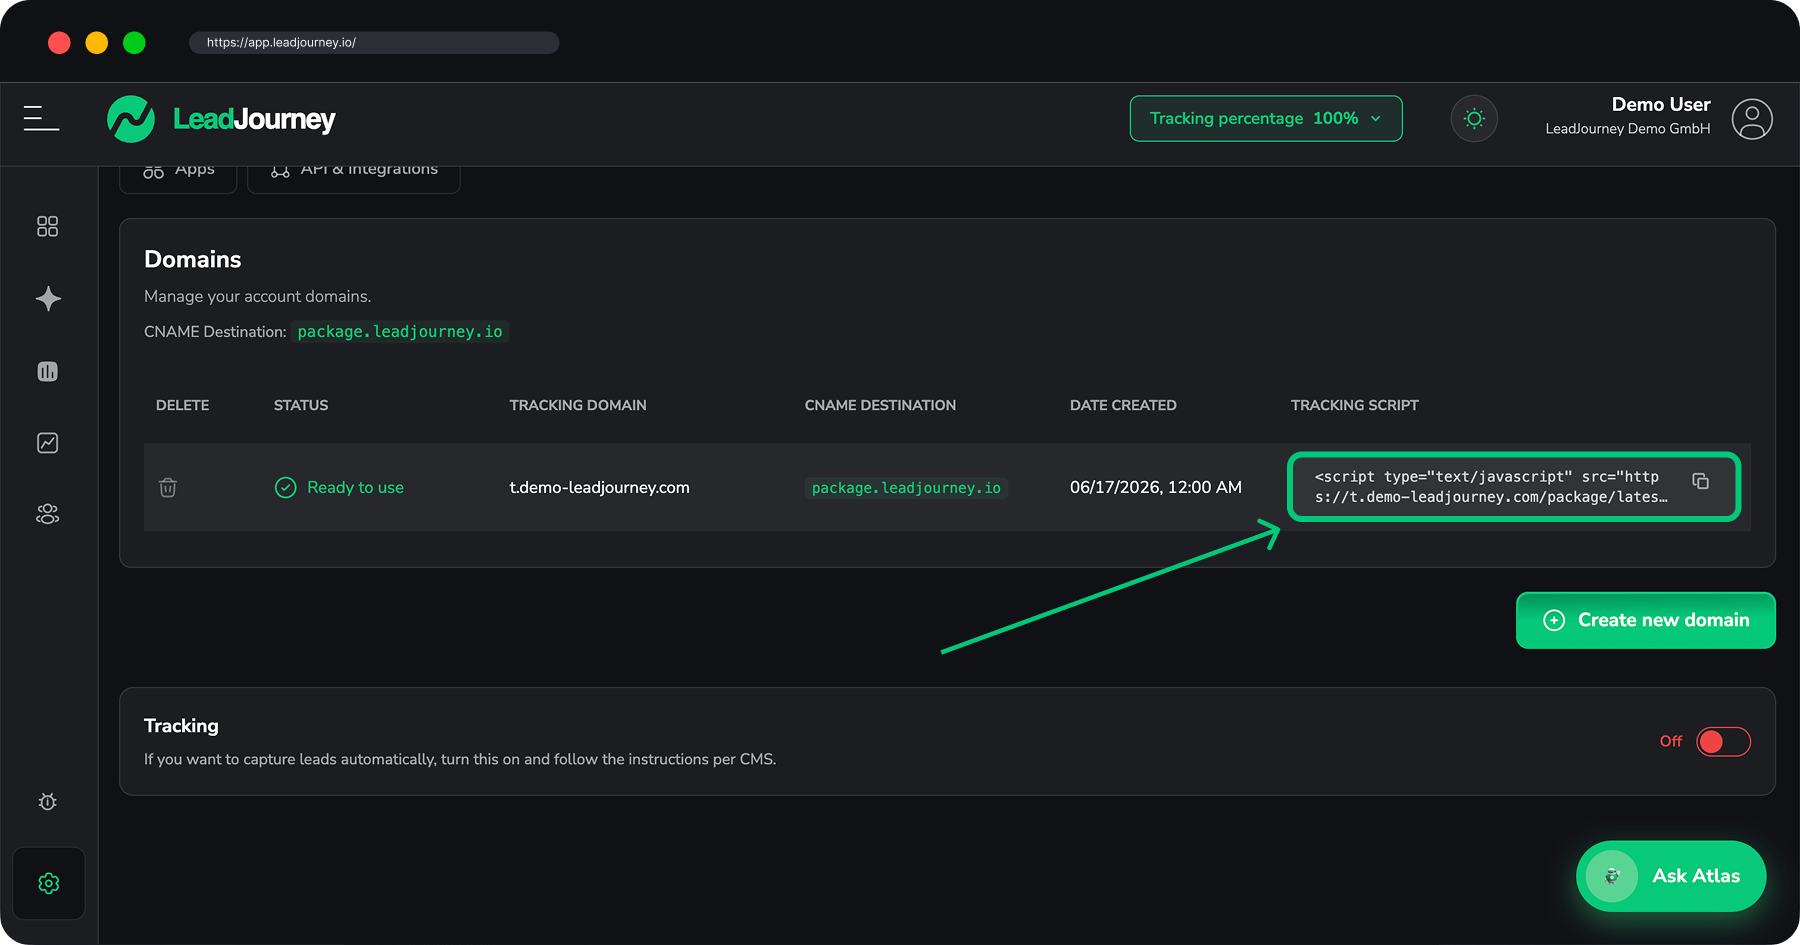
Use your own snippet
Always copy the snippet straight from your settings – the domain and workspace ID are unique to your account. The example above is just for illustration.
Install it on every page
Paste the snippet inside the <head> of every page you want to track – all your
landing pages, domains and subdomains – and publish the change.
Install it everywhere
Add the script to every domain and subdomain in your funnel (for example your landing page, your checkout and your thank-you page). A visitor that moves to a page without the script can't be tracked there.
Or use your website builder
Most builders have a dedicated place for <head> code – no developer needed. Set the
trigger/scope to all pages wherever it's offered.
Install the "Insert Headers and Footers" plugin and paste the snippet into the
Header section. With Elementor Pro, use Site Settings → Custom Code → Add Custom
Code with location <head>.
→ Full WordPress guide (plugin, Elementor, Divi, theme, child theme).
Project Settings → Custom Code → Head Code. Paste the snippet, then save and publish.
Dashboard → Settings → Custom Code → Add Custom Code. Paste into Head, set Add Code to Pages to All pages, and Apply, then publish.
Settings → Advanced → Code Injection → Header. Paste the snippet and save.
Site Settings → General → Custom Code → Head. Paste the snippet and publish.
In the editor, open the code symbol (</>), switch to Site Code → <head>, paste the
snippet and publish.
Per funnel step: ⋯ → Tracking Code → Head, paste the snippet and Save. Repeat for every step, then publish with the ⚡ icon.
→ Full Perspective guide (why it's per step and how leads are counted).
Open your Funnel / Website → Settings and paste the snippet into the Head Tracking Code field, then save and publish.
→ Full GoHighLevel guide (funnel vs. per-step, and how to track form leads).
Create a new tag of type Custom HTML, paste the snippet and set the trigger to All Pages, then submit/publish the container.
Add the snippet to your index.html <head>. For React / Vue / Svelte single-page apps,
the script's built-in MutationObserver handles client-side route changes
automatically – no extra setup needed.
→ Full custom-code guide (static HTML, server templates, SPA, Next.js, Nuxt).
Verify tracking
Open your website (ideally with the campaign URL parameters), then return to Settings → Tracking. Once the first page views arrive, LeadJourney confirms the script is live.
Tracking not detected?
Check that your tracking domain is Ready to use, that the snippet sits inside the
<head>, that you copied your own snippet (correct domain + workspace ID), and that a
cookie banner or ad blocker isn't stripping the script before it loads.
Related articles
Set up your tracking domain
Step 1: create the domain your snippet loads from.
What is the tracking script?
What it captures and how attribution works.
Connect Meta Ads
Tag your campaigns so clicks carry attribution data.
UTM parameters & the UTM Builder
Tag organic, social and email links so those clicks are attributed too.
1. Set up your tracking domain
Create a custom tracking domain and point a CNAME to package.leadjourney.io – the foundation for first-party, server-side tracking.
Install the tracking script on WordPress
Add the LeadJourney tracking script to a WordPress site – via a header/footer plugin, Elementor, Divi, your theme settings or a child theme.