Features
Tags & Rules
Categorize your leads with colored tags – create them, auto-tag leads with URL rules, apply them manually or via webhook, and see where they show up across LeadJourney.
Tags are colored labels you attach to leads to categorize them – by source, funnel, product, status or anything else that matters to you. Once a lead is tagged, you can filter, sort and read your reports by that tag instead of digging through raw URLs.
A tag can be applied three ways: automatically by a rule that matches the lead's landing URL, manually on a single lead or in bulk, or via your postback webhook.
In short
A tag = a name + category + color. Add rules to a tag and LeadJourney applies it automatically whenever a new lead's URL matches – no rules means the tag is applied only by hand or through your webhook.
Who can manage tags
Tags live in Settings → Tags. The tab only appears for users whose role has the Tags permission. If you don't see it, ask a workspace owner to grant the permission or to make the change for you.
Where to find it
In LeadJourney, open Settings → Tags, or go straight to app.leadjourney.io/settings?slug=tags.
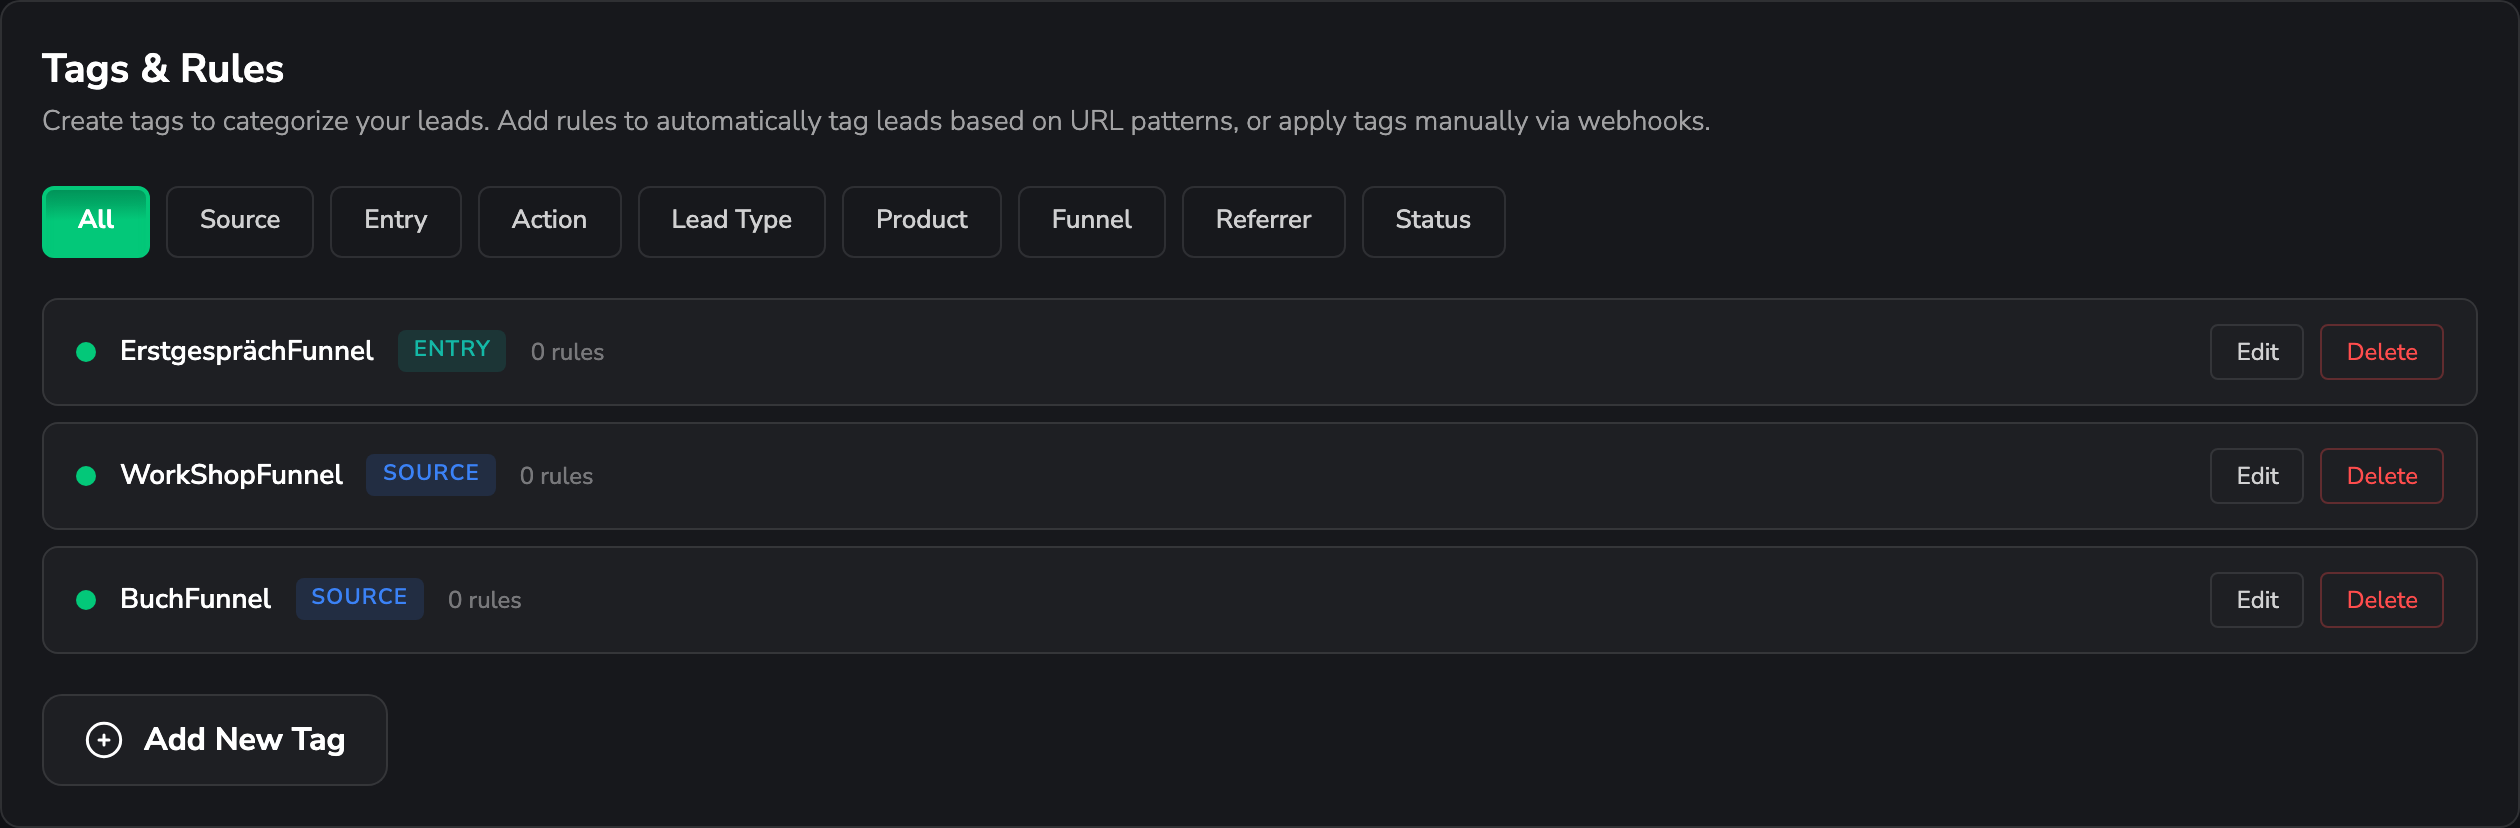
The Tags & Rules card lists every tag in the workspace. Use the filter buttons at the top (All, Source, Entry, Action, Lead Type, Product, Funnel, Referrer, Status) to narrow the list to one category. Each row shows the tag's color, name, category, how many rules it has, and Edit / Delete actions.
Anatomy of a tag
Every tag has four parts, set in the Create / Edit Tag dialog:
- Name – a unique label, up to 50 characters (e.g. Marketplace Service).
- Category – one of eight groupings used to organize and filter your tags. It doesn't change how a tag behaves; it just keeps your list tidy. See the table below.
- Color – pick one of ten presets or choose a custom color. The color is used for the tag's badge everywhere it appears.
- Show in Customer Journey Report – on by default. When you turn it off, the tag no longer appears in a lead's journey timeline, but it still works for filtering and rules.
Tag categories
Categories are for organizing
A tag's category is purely organizational – it powers the filter buttons on the Tags page. Pick whichever one best describes the tag.
| Category | Typical use |
|---|---|
| Source | Where the lead came from – Meta, Google, a newsletter |
| Entry | The entry point or landing area on your site |
| Action | An action the lead took |
| Lead Type | The kind of lead – B2B, B2C, returning … |
| Product | The product or service the lead is interested in |
| Funnel | Which funnel or campaign the lead belongs to |
| Referrer | The referring site or partner |
| Status | A stage or state – new, qualified, won … |
Create a tag
Open the Tags settings
Go to Settings → Tags and click Add New Tag. To change an existing tag, click Edit on its row instead.
Name it and pick a category and color
Give the tag a clear name, choose a category that fits, and pick a color. The color is what you'll recognize the tag by in your reports, so make it distinct.
Decide whether it shows in the journey
Leave Show tags in Customer Journey Report on if you want the tag to appear in each lead's timeline. Turn it off for internal or noisy tags you'd rather keep out of the journey view – they'll still work for filtering and rules.
(Optional) Add auto-tagging rules
Add one or more rules so LeadJourney applies the tag automatically. See Auto-tagging with rules below. Skip this if you only want to apply the tag by hand or via webhook.
Save
Click Create Tag (or Update Tag when editing). The button stays disabled until the tag has a name. A confirmation appears once it's saved, and the new tag shows up in the list.
Auto-tagging with rules
Rules let a tag apply itself. Whenever a new lead arrives, LeadJourney checks its landing URL against the tag's rules and, if they match, attaches the tag automatically.
Each rule is made of a field, an operator and a value:
| Field | Matches against |
|---|---|
| Entry Page | The path of the first page the visitor landed on – e.g. /marketplace-service/ |
| Full URL | The complete landing URL, including domain and query – e.g. https://example.com/page |
| Referrer Domain | The domain that referred the visitor – e.g. google.com |
The available operators are Contains, Equals, Not Contains, Starts With and Ends With.
When a tag has more than one rule, the rule logic dropdown decides how they combine:
- All rules match (AND) – the lead is tagged only when every rule is true.
- Any rule matches (OR) – the lead is tagged when at least one rule is true.
Apply rules to existing leads
Rules normally affect leads going forward. Tick Apply rules to existing leads in the dialog to also tag matching historical leads. This runs in the background, so it may take a moment to work through your data.
Apply a tag manually
You don't have to rely on rules. In the lead overview, open a lead's actions menu and choose Add tag, then pick the tag you want. To tag several leads at once, select them and use the bulk Assign tag action. A tag with no rules is meant to be applied this way.
Apply a tag via webhook
You can also set a tag from your postback (server-side conversion) request. Include the tag's name in the JSON body:
{
  "tag": "Your Tag Name"
}
LeadJourney matches the value against your existing tag names and attaches it to the lead.
Where your tags show up
- Lead overview – a Tags column shows each lead's tags as colored badges, and you can sort by it.
- Customer Journey Report – tags appear in the lead's timeline, unless you turned off Show in Customer Journey Report for that tag.
- Filtering and reports – use tags to slice your data instead of relying on raw URLs.
Edit or delete a tag
Click Edit on any row to change a tag's name, category, color, journey visibility or rules. Editing the rules of an existing tag does not retag past leads unless you tick Apply rules to existing leads again.
Deleting removes the tag from every lead
Delete asks you to confirm, then removes the tag from all leads it was attached to. This can't be undone – the leads themselves are untouched, but they lose the tag.
Related articles
Affiliate tracking
Track the offers you promote as an affiliate – the four building blocks (networks, offers, campaigns and landing pages) that let you see true ROI per campaign, offer and network.
Custom Fields
Capture extra CRM data – industry, job title, deal size – alongside your events, and turn it into a dimension you can Group By and Filter in every report. Learn what custom fields are, why they matter, how to create one, and how to send the data to LeadJourney.