Features
Custom Fields
Capture extra CRM data – industry, job title, deal size – alongside your events, and turn it into a dimension you can Group By and Filter in every report. Learn what custom fields are, why they matter, how to create one, and how to send the data to LeadJourney.
LeadJourney already knows the standard facts about a lead – which click, channel, campaign and ad they came from, and the events they triggered. Custom fields let you attach the facts that live in your business but never appear in a URL or an ad: a lead's industry, job title, company size, deal size, plan, or anything else your CRM tracks.
Once a field exists, every value you send becomes a dimension you can Group By or Filter in your reports – so you can answer questions like "which channel brings the most enterprise leads?" or "what's my cost per lead by industry?".
In short
A custom field = a name + type + a webhook key. Create it once under Settings → Events →
Custom Fields, then send the value nested under custom_fields in the same webhook you already
use for events. No new endpoint, no extra integration.
Why custom fields matter
Your tracking already tells you where a lead came from. Custom fields tell you who they are and what they're worth – and let you slice every report by that:
- Find your best-fit traffic. Group a campaign report by Industry or Company Size to see which channels bring the customers you actually want, not just the cheapest leads.
- Spot quality, not just volume. Two campaigns can have the same CPL but very different deal sizes. A custom field surfaces that.
- Segment without messy URLs. Instead of encoding everything into landing-page URLs, send the attribute straight from your CRM where it's already accurate.
Who can manage custom fields
Custom fields live under Settings → Events, which is gated by the Events
(offline_conversions) permission. If you don't see the tab, ask a workspace owner to grant it or
to make the change for you. See Add users to your workspace.
Where to find it
Open Settings → Events and switch to the Custom Fields tab, or go straight to app.leadjourney.io/settings?slug=offline-conversions.
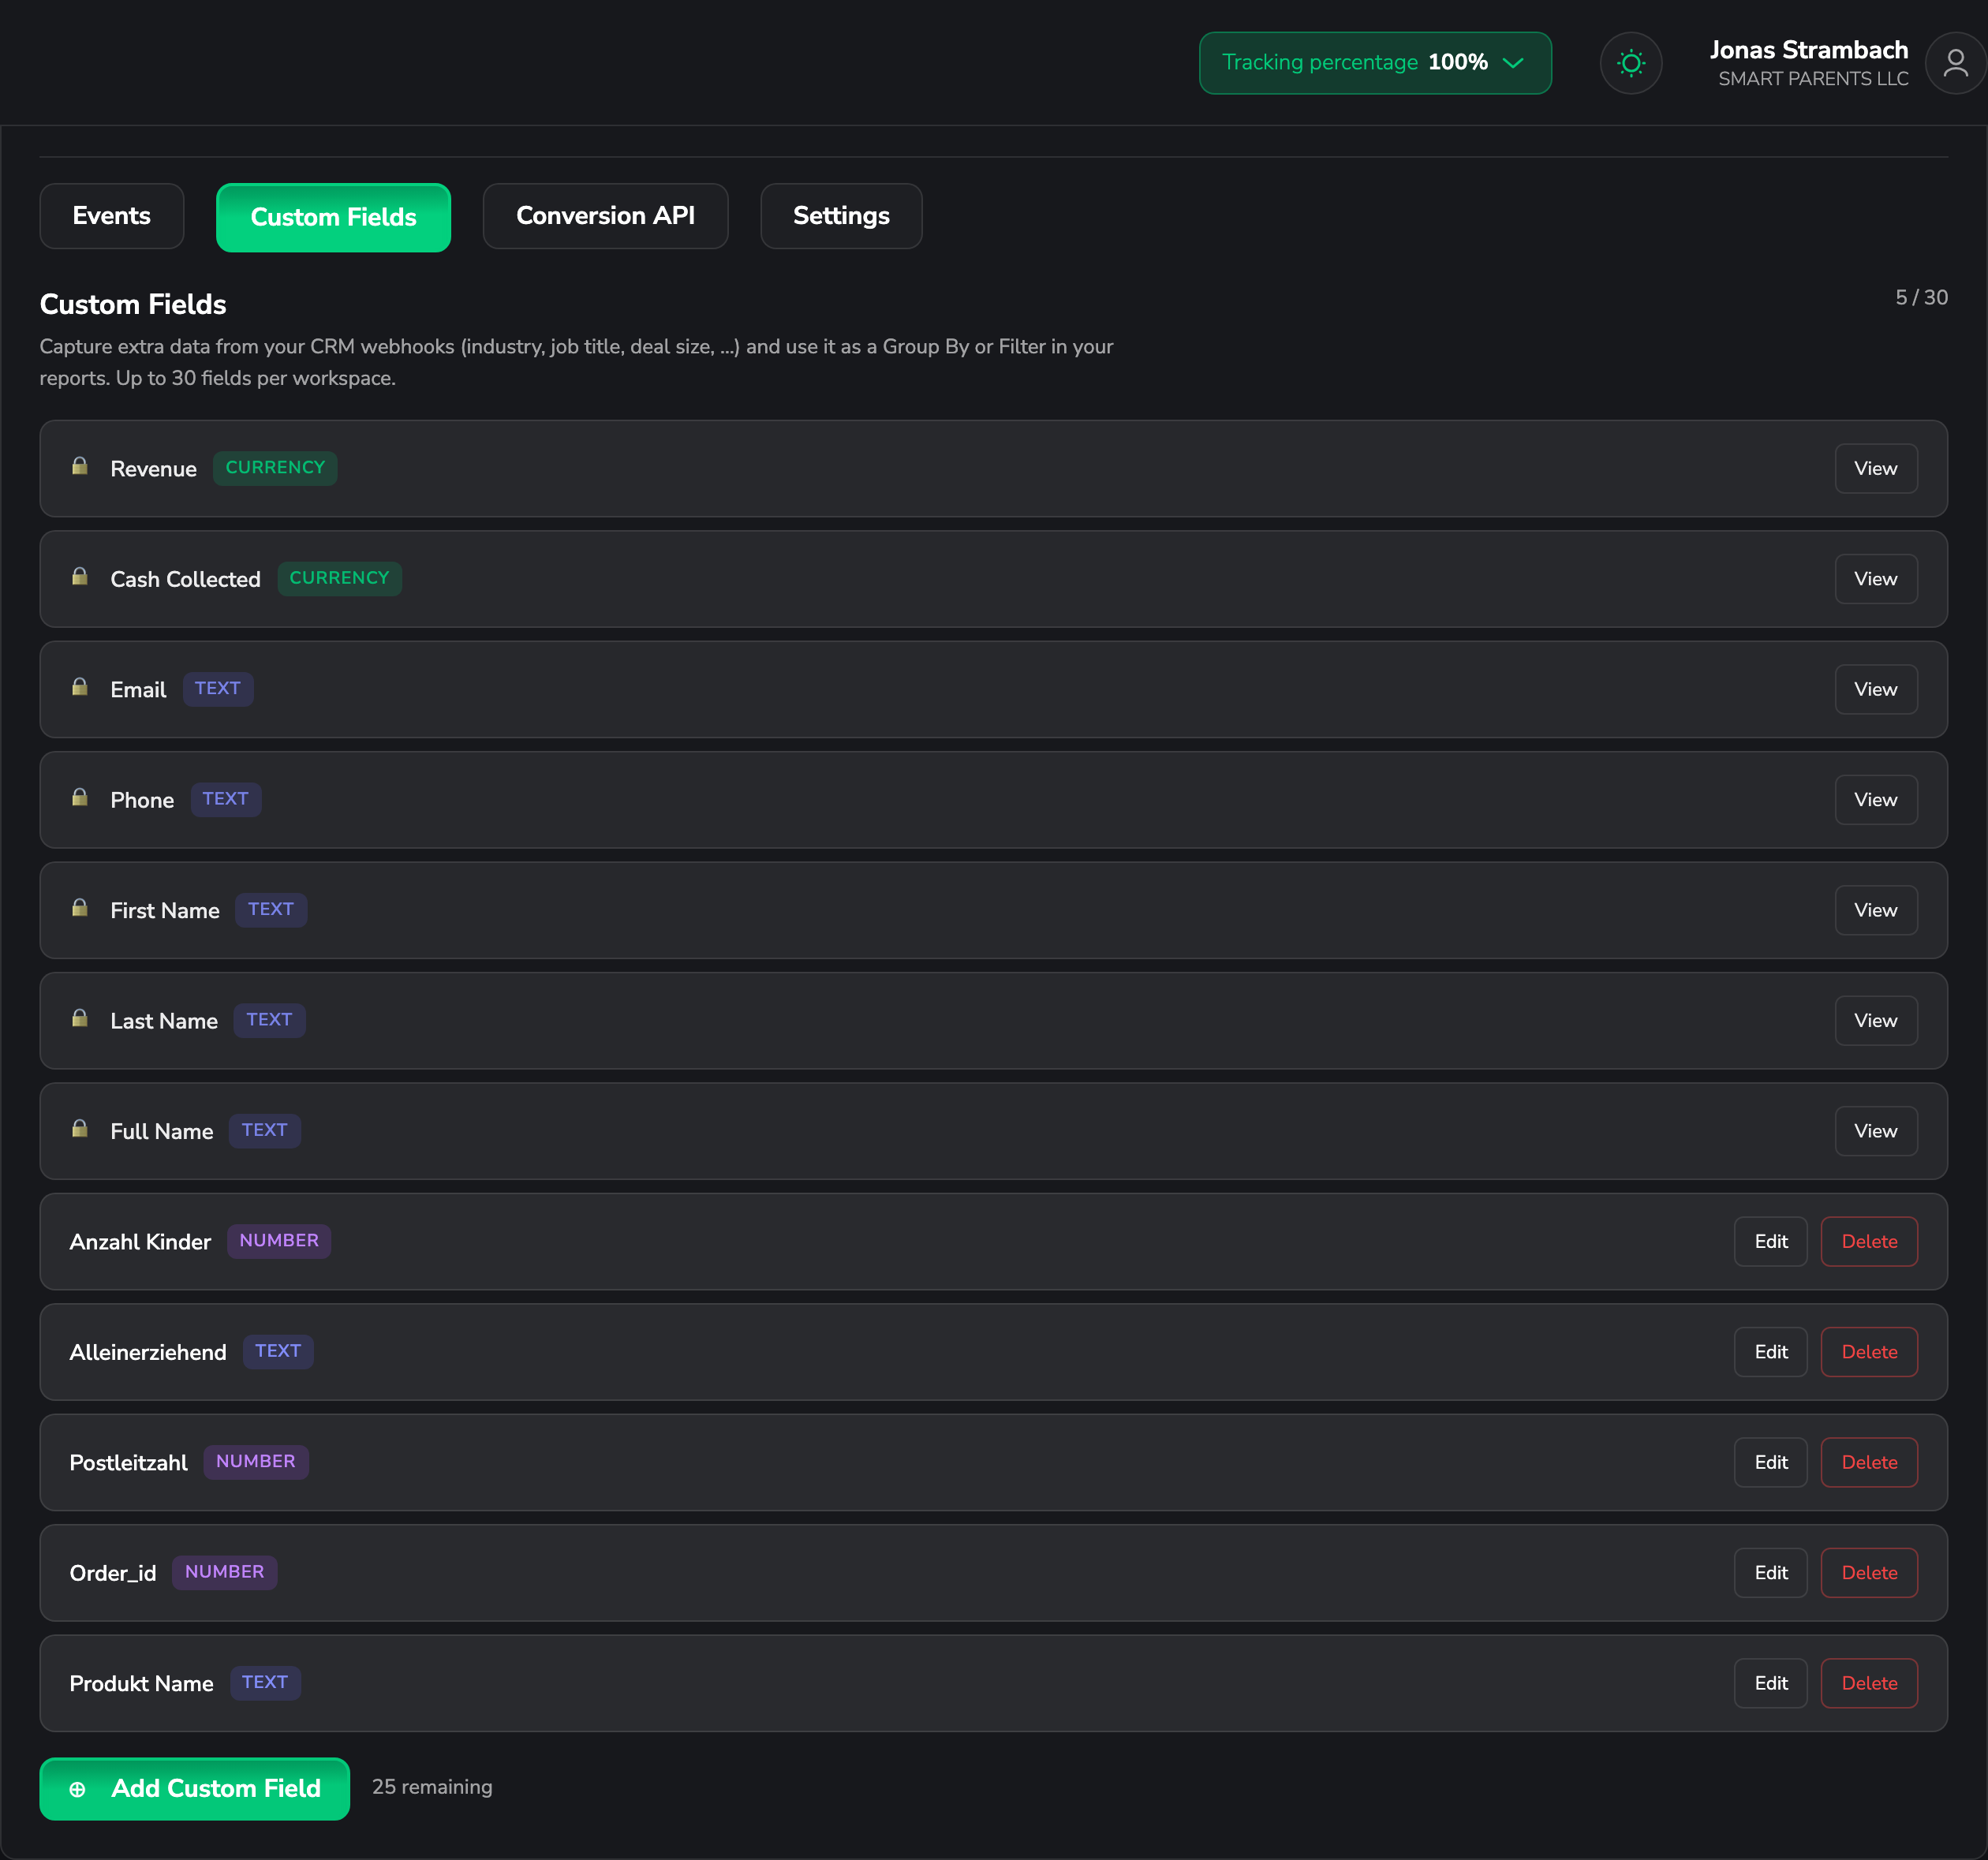
The tab lists every field with its name and a type chip (Text, Number or Currency), and shows a counter in the corner – you can create up to 30 custom fields per workspace. Some fields are marked with a lock (🔒): these are default fields managed by LeadJourney, which you can view but not edit or delete.
Field types
Pick the type that matches the data – it controls how the value is stored and displayed:
| Type | Use it for | Example value |
|---|---|---|
| Text | Categories and labels – industry, plan, source. | "Software" |
| Number | Plain counts and scores – team size, lead score. | 100 |
| Currency | Money amounts – deal size, contract value. | 1499.00 |
Currency values are shown in your workspace currency. See How do I change my workspace currency?.
Create a custom field
Open the Custom Fields tab
Go to Settings → Events → Custom Fields and click Add Custom Field.
Name it and pick a type
Give the field a clear Field Name (e.g. Industry) and choose its Type (Text, Number or
Currency).
Type is fixed after creation
You can rename a field later, but its type can't be changed once it's created. If you need a different type, create a new field.
Check the webhook key
LeadJourney auto-fills a Webhook Key from the name (e.g. industry) – the exact key you'll send
in your payload. It allows letters, numbers and underscores only and must start with a letter.
You can adjust it while creating the field, but like the type it's locked after creation, so
pick something stable.
Make it available in reports
Leave Available in reports as Group By and Filter ticked so the field shows up as a dimension in the Report Builder and report filters. (Untick it if you only want to store the value on the lead without it appearing as a reporting dimension.)
Copy the snippet and save
The modal shows the exact JSON snippet to send – with your key already filled in. Copy it for reference, then click Create Field. The field appears in the list straight away.
After creating, you can Edit a field's name (and its reports toggle) or Delete it. Deleting keeps the historical values already stored on past events, but the dimension stops appearing in new reports.
How to send the data
Custom fields don't need a new endpoint. You send them nested under custom_fields inside the
same event/conversion webhook you already configured in the
Events & the Events Manager. LeadJourney reads each key and
matches it to the field you created.
{
  "type": "WonClient",
  "email": "[email protected]",
  "revenue": 1499.00,
  "custom_fields": {
    "industry": "Software",
    "company_size": 100,
    "deal_size": 1499.00
  }
}- Use the exact webhook key you defined (here
industry,company_size,deal_size). - The event still needs an identifier – a
click_id,emailorphone– so it can be matched to the right lead. See How events are matched. - Send the value in the right shape for the type: a string for Text, a number for Number or Currency.
Create the field first
Create the custom field before you start sending its key. That guarantees the key matches and the value is stored and exposed as a reporting dimension. You can send custom fields from your CRM directly, or via an automation tool like Zapier or Make.
Keep values consistent
Group By works on the exact value you send, so Software, software and SaaS count as three
different groups. Normalise the value in your CRM (or your automation) before sending so your
reports stay clean.
Using a custom field in reports
Once values are flowing in, the field becomes available across LeadJourney:
- In the Report Builder and the Campaign Report, pick it under Group By to break any report down by that attribute, or add it as a Filter.
- On a lead, the value appears in the Info tab of Lead Overview.
Common questions
Related articles
Events & the Events Manager
Send conversions to LeadJourney – the webhook your custom fields ride along with.
Report Builder
Group by and filter on your custom fields to slice any report.
Custom Metrics
Build calculated columns from a formula over your existing metrics.
Organise campaigns with tags
Another way to segment – colour-coded labels applied by rules or webhook.
Tags & Rules
Categorize your leads with colored tags – create them, auto-tag leads with URL rules, apply them manually or via webhook, and see where they show up across LeadJourney.
Custom Metrics
Build your own calculated columns from a formula over LeadJourney's existing metrics – cost per booked call, lead-to-call rate, net profit, anything. Learn how to create a custom metric in the column settings and add it to your reports.